GoodSync Control Center Runner 部署指南
部署概述
本指南介绍如何在 Windows、Mac、Linux/NAS 与 Android 平台部署 GoodSync CC Runner。Runner 连接到 Control Center,接收 Job,执行 Job 并把结果回传到 Control Center。
1. 获取 Company ID
在任何受支持平台向客户端计算机部署 Runner 之前,必须先获取 Company ID — 它使 Runner 安装包能连接到特定的 Control Center 实例。
Company ID 始终在 Control Center 顶部栏的公司名称旁显示:

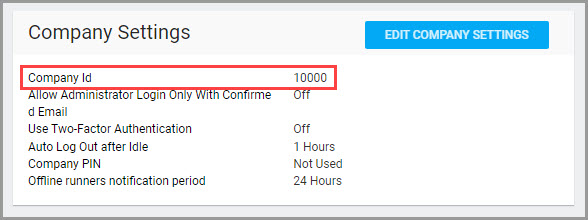
另外,Company ID 也可在 Company Settings 中查看:
- 登录 Control Center。
- 进入「Settings」面板。
- 在「Company Settings」面板找到 Company ID,按需复制。
2. Windows 部署 Runner
GUI 安装包
在少量计算机部署时,使用 GUI 安装包是更简单的入门方式。
GUI 安装包会请求以下信息:
- CC CompanyId
- CC CompanyPin
- GoodSync Account UserId
- GoodSync Account Password
它还提供两种运行方式选项:
- GUI Client — 仅显示托盘图标。
- Windows/Mac Service — 无 GUI,但即使用户登出 CC-Runner 仍在运行。
命令行安装包
- 下载 GoodSync CC Runner Windows 安装包。
- 打开命令提示符并切换到安装包所在文件夹(默认通常为
C:\Users\Username\Downloads)。可用cd命令切换目录、用dir查看当前目录内容。 - 使用合适的选项运行安装包。有两种用户配置方式:
① 用户空间(User space):Runner 仅在用户登录时以托盘图标方式运行 — 不需要 Windows 用户账户密码(因为用户已登录)。命令如下:
GoodSync-vsub-CC-Runner-Setup.exe /cc-runner=user /cc-coid=CompanyId /cc-copin=CompanyPin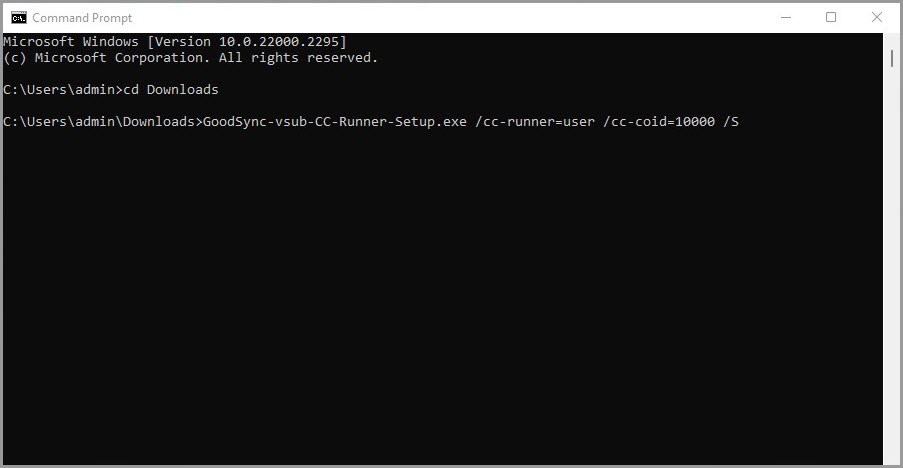
② 服务(Service):用户登出后 Runner 仍会运行。该方式不能用于大规模部署 — 需要通过
/sys-userid与/sys-passwd选项指定 Windows 用户账户凭据。命令如下:GoodSync-vsub-CC-Runner-Setup.exe /cc-runner=service /cc-coid=CompanyId /cc-copin=CompanyPin /sys-userid=username /sys-passwd=userpassword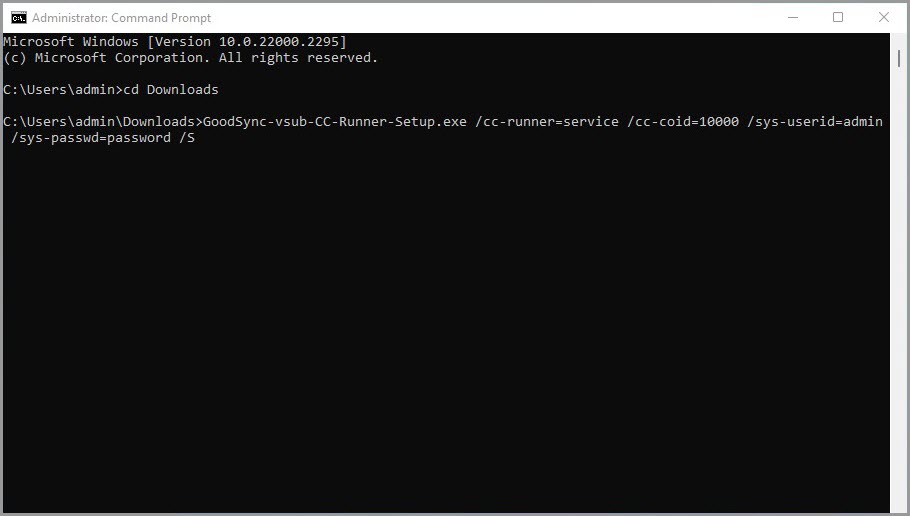
可加上
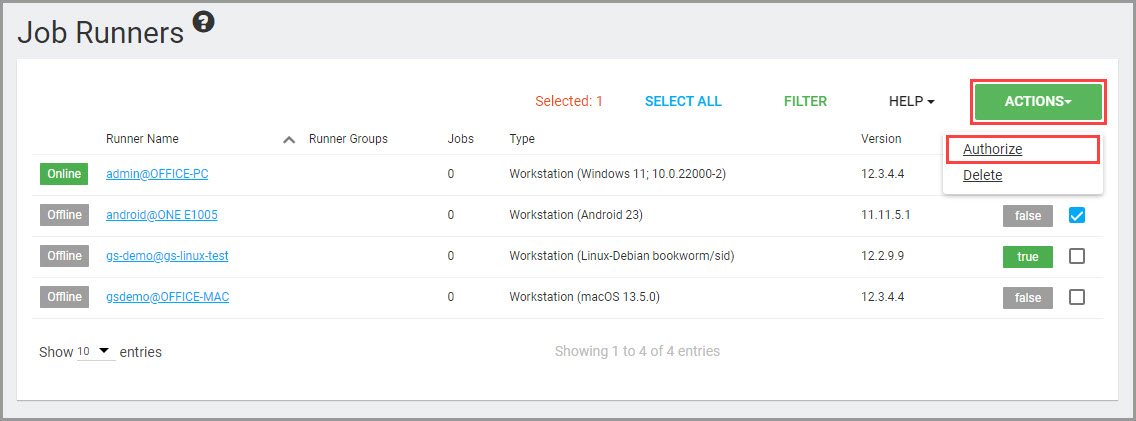
/S选项进行静默安装。 - 安装完成后,进入 Control Center 的「Job Runners」面板 — 已安装的 Runner 会出现在 Runner 列表中。
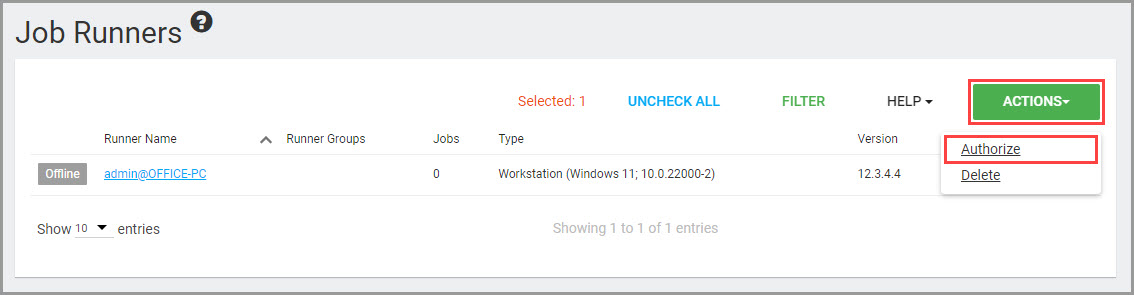
- 在列表中勾选新安装 Runner 右侧的复选框,点击「Actions」并选择「Authorize」授权 Runner — 之后它即可接收分配的 Job。
3. Windows 安装参数与选项
/cc-runner=user|service- 「user」表示在用户空间安装 Control Center Runner。注意:这里的「user」是字面值,不要替换为实际用户名。「service」表示安装为系统服务。
/cc-coid=CompanyId- 设置 Company ID — 在 Control Center UI 的 Settings 面板中可找到。
/mini-progress=yes|no- 是否显示 Mini Progress 弹窗 — 用于显示 Job Run 的状态与进度。
/user-close=yes|no- 是否允许用户通过任务栏图标或 Mini Progress 弹窗关闭 Runner。
/sys-userid=username- Runner service 将以哪个 Windows 用户身份运行。
/sys-passwd=userpassword- Runner service 运行所用 Windows 用户的密码。
/cc-url=serverURL- 设置自托管 Control Center Server 实例的 URL — Runner 从该实例获取 Job。默认为
https://jobs.goodsync.com。 /cc-copin=CompanyPin- 如果 Control Center Settings 中设置了 Company PIN,Runner 必须提供正确的 PIN 才能连接。
/cc-allow-bad-certs- 允许 Runner 与使用自签证书(TLS/SSL)的 Control Center Server 通信 — 不推荐。
/cc-proxy=host:port- 用于连接 Control Center Server 的代理主机与端口。
/cc-proxy-auth=user:password- 用于连接 Control Center Server 的代理身份验证凭据。
/S- 以静默模式运行安装包,不显示任何 GUI。这使其可作为 MSI 用于静默安装与大规模部署。
4. Runner 大规模部署
对所有或一批计算机进行大规模部署时,可使用相同的用户空间设置命令(带 /cc-runner=user 标志),并通过 GPO、计划任务等方式向所有设备推送。
初次安装后,Runner 会创建自己的启动任务 — 因此该命令只需在所有设备上运行一次。
通过 SCCM 大规模部署
请参考 SCCM 部署指南。
通过 GPO 大规模部署
请参考 GPO 部署指南。
5. Mac 部署 Runner
CC-Runner GUI 安装包将很快在此提供:CC Runner Mac GUI 安装包。
CC-Runner 命令行安装包
- 下载 GoodSync CC Runner Mac 安装包。
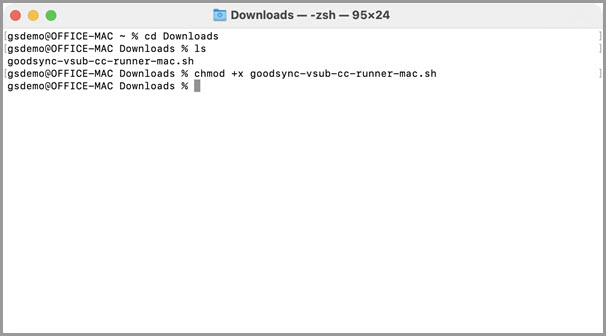
- 打开终端窗口并切换到安装包所在文件夹(默认通常为
/Users/Username/Downloads)。可用cd命令切换目录、用ls查看当前目录内容。 - 授予安装包执行权限:
chmod +x goodsync-vsub-cc-runner-mac.sh如果命令成功执行,将不会显示任何结果或消息。
- 使用合适的选项运行安装包。有两种用户配置方式:
① 用户空间(User space):Runner 仅在用户登录时运行。命令如下:
./goodsync-vsub-cc-runner-mac.sh /cc-runner=user /cc-coid=CompanyId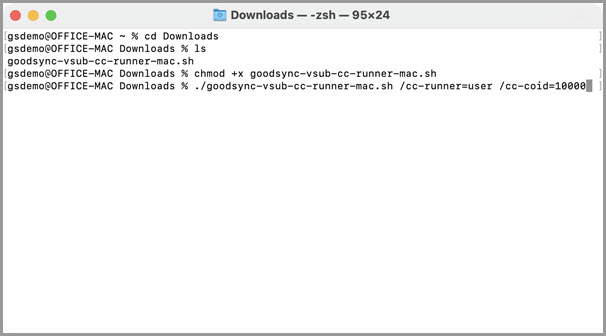
② 服务(Service):用户登出后 Runner 仍会运行。命令如下:
./goodsync-vsub-cc-runner-mac.sh /cc-runner=service /cc-coid=CompanyId /sys-userid=username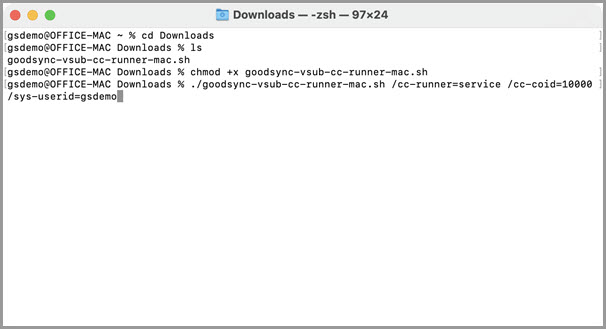
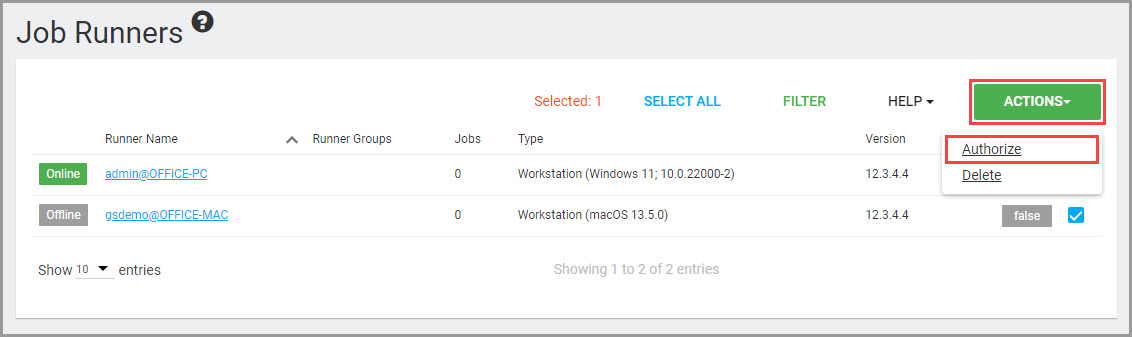
- 安装完成后,进入 Control Center 的「Job Runners」面板 — 已安装的 Runner 将出现在 Runner 列表中。
- 在列表中勾选新安装 Runner 右侧的复选框,点击「Actions」并选择「Authorize」授权 Runner — 之后它即可接收分配的 Job。
6. Mac 安装参数与选项
/cc-runner=user|service- 「user」将 CC-Runner 安装为以托盘图标呈现的 GUI 客户端;「service」将 Control Center Runner 安装为系统服务。
/cc-coid=CompanyId- 设置 Company ID — 在 Control Center UI 的 Settings 面板中可找到。
/sys-userid=username- Runner service 将以哪个 macOS 用户身份运行。
/cc-url=serverURL- 设置自托管 Control Center Server 实例的 URL — Runner 从该实例获取 Job。默认为
https://jobs.goodsync.com。 /cc-copin=CompanyPin- 如果 Control Center Settings 中设置了 Company PIN,Runner 必须提供正确的 PIN 才能连接。
/cc-acct-pwd=password- 设置 Server Account 加密密码 — Runner 用它解密 Server Accounts。
/cc-allow-bad-certs- 允许 Runner 与使用自签证书(TLS/SSL)的 Control Center Server 通信。
/cc-proxy=host:port- 用于连接 Control Center Server 的代理主机与端口。
/cc-proxy-auth=user:password- 用于连接 Control Center Server 的代理身份验证凭据。
7. Linux/NAS 部署 Runner
- 从此处下载 GoodSync CC Runner Linux 安装包:
https://www.goodsync.com/download/cc-runner-install-x86_64-release.run - 授予下载的安装包执行权限:
chmod +x cc-runner-install-x86_64-release.run如果命令成功执行,将不会显示任何结果或消息。

- 运行安装包:
./cc-runner-install-x86_64-release.run
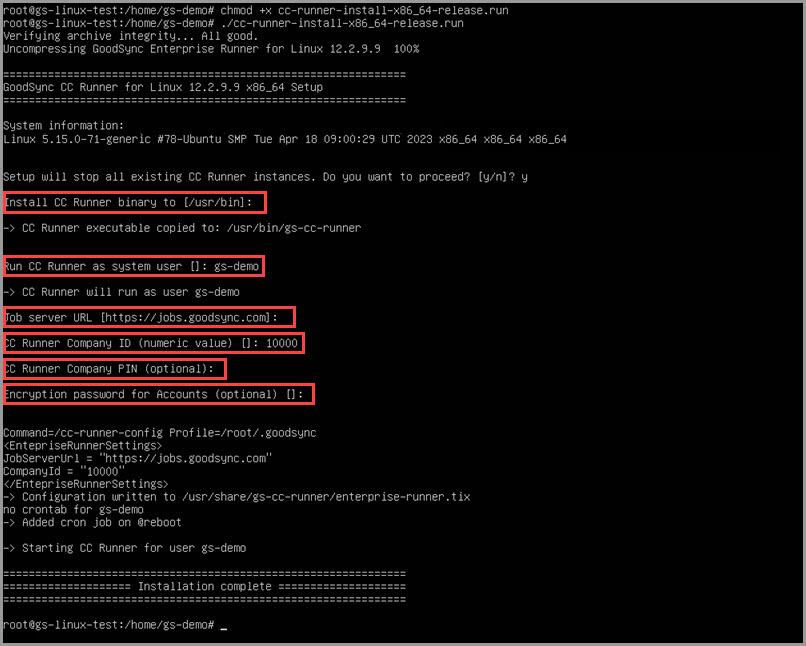
Runner 安装包会提示输入以下信息:
- Binary installation directory — Runner 安装的目录路径。如果不输入,将使用默认路径
/usr/bin/gs-cc-runner。 - System user — Runner 将代以何 Linux 用户账户身份运行。
- Job server URL — Control Center URL。如果不输入,将使用默认值
https://jobs.goodsync.com。NOTE:如果使用自托管 Control Center,请输入自托管服务器的 IP。
- Company ID — 指向特定的 Control Center 实例。
- Company PIN — 用于将到来的 Runner 加入白名单(可选)。
- Encryption password — Server Account 加密密码(可选) — Runner 用它解密 Server Accounts。
安装包会创建一个 cron 任务,使 Runner 在系统启动时自动运行。
- Binary installation directory — Runner 安装的目录路径。如果不输入,将使用默认路径
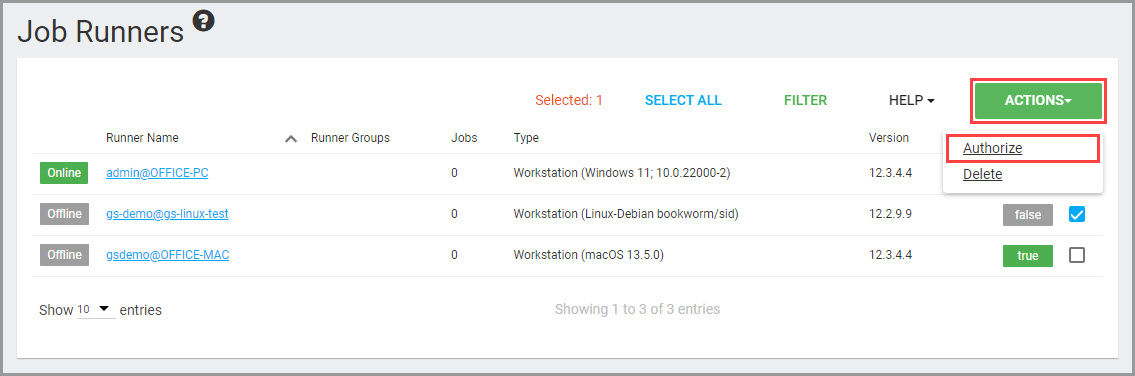
- 安装完成后,进入 Control Center 的「Job Runners」面板 — 已安装的 Runner 将出现在 Runner 列表中。
- 在列表中勾选新安装 Runner 右侧的复选框,点击「Actions」并选择「Authorize」授权 Runner — 之后它即可接收分配的 Job。
8. Android 部署 Runner
要将 Android 设备连接到 Control Center,请使用为 Android 设计的 GoodSync CC Runner 应用。
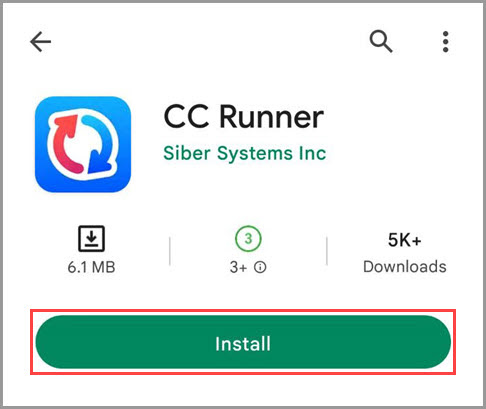
- 在 Google Play 中搜索「GoodSync Runner」,在搜索结果中点击「CC Runner」。
- 进入应用页面后点击「Install」。
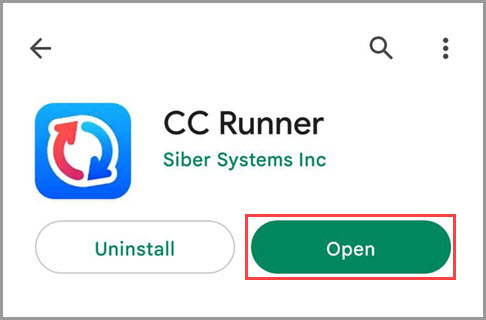
- 安装完成后点击「Open」。
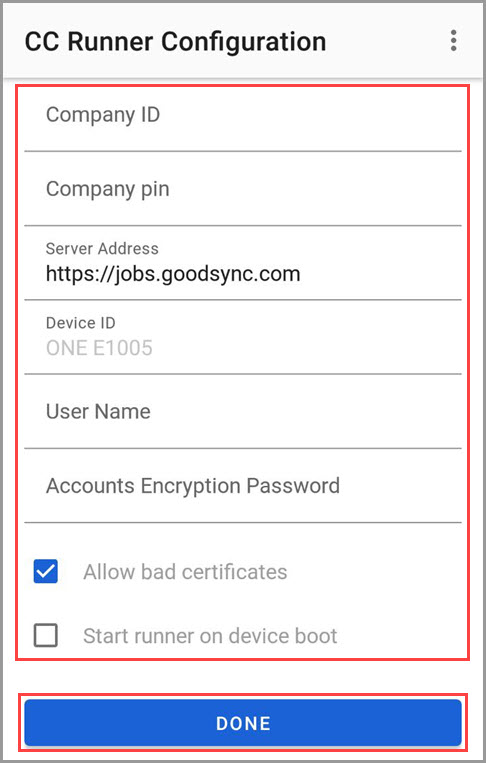
- 输入以下信息将 Runner 连接到 Control Center:
- Company ID — 指向特定的 Control Center 实例。
- Company PIN — 用于将到来的 Runner 加入白名单(可选)。
- Server Address — Control Center URL。如果不输入,将使用默认
https://jobs.goodsync.com。NOTE:如果使用自托管 Control Center,请输入自托管服务器的 IP。
- User Name — Runner 将以「user-name@device-id」形式在 Control Center 中标识。
- Accounts Encryption Password — Server Account 加密密码(可选) — Runner 用它解密 Server Accounts。
- Allow bad certificates — 允许 Runner 与使用自签证书(TLS/SSL)的 Control Center Server 通信。
- Start runner on device boot — 确保 Runner 在设备启动时自动运行。填好相应信息后点击「Done」。
- Runner 配置完成后,点击「Start」启动它。
- 接下来进入 Control Center 的「Job Runners」面板 — 已安装的 Runner 将出现在 Runner 列表中。
- 在列表中勾选新安装 Runner 右侧的复选框,点击「Actions」并选择「Authorize」授权 Runner — 之后它即可接收分配的 Job。